Selective greyscale in The GIMP
by Anton Piatek
I decided to make a selective greyscale image in The GIMP, and as lots of friends say to me that they would like to use The GIMP more but don’t know how, I thought I would write a bit of a walkthru for how I did it.
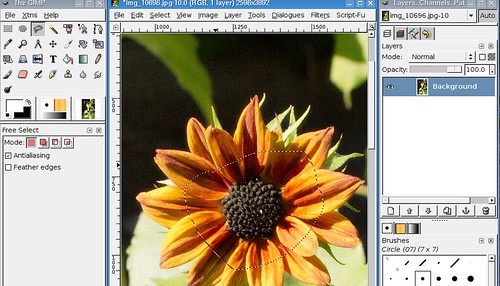
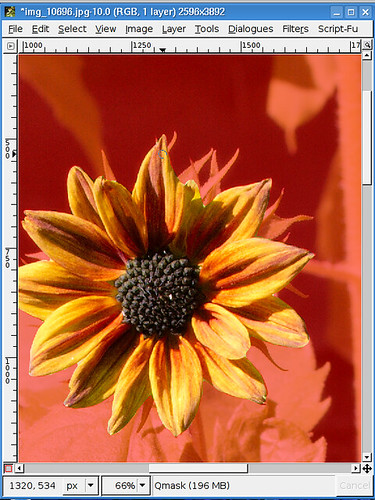
Starting with your colour image, use the lasso tool to select a large chunk of the area you want coloured (this is optional but usually makes things faster)
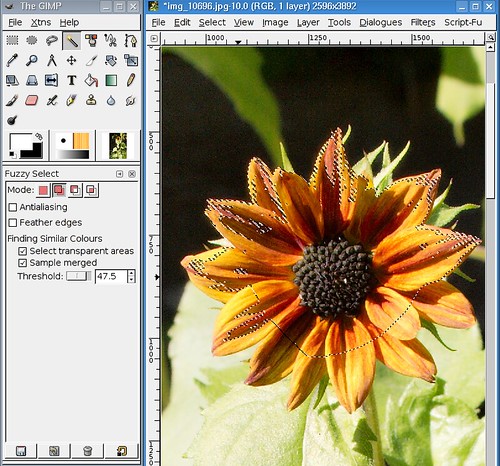
The next step is to get a coarse selection of the area we want coloured. You can use the “select by color” tool if the colour is pretty distinctive in your image, or use the “select contiguous regions” tool as I did. Holding shift will force the tool to add to the selection (otherwise it might try to move it if you click on an already selected area). Keep shift-clicking until you have most of the area you want selected.
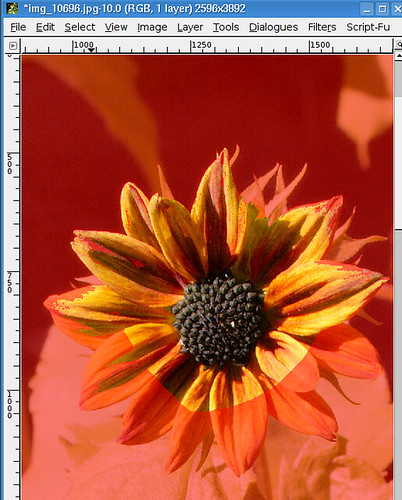
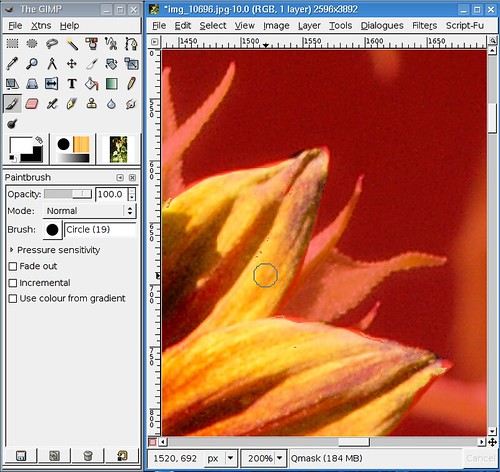
Next use a quickmask to start fine-tuning the selection. In the bottom left of the image window, click the little red box to turn on the quickmask. The red area is the area outside of the selection, so we want to make everything around the flower red.
Select a large paintbrush and paint in the areas you want to be in your selection. Painting white will add to the selection, painting black will remove from the selection. If you make a mistake you can use undo, or paint with black to correct (you can swap the foreground and background colours by clicking the arrow by the colour selector)
Move to a smaller brush to fine tune the selection.
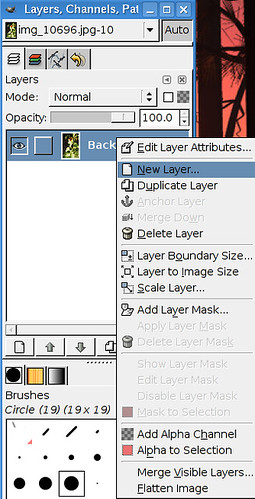
When your selection is good enough, turn off the quickmask again by clicking the little red square in the bottom left. At some point we need to make a copy of the layer, so we can do that now by right clicking the layer in the layers dialog box, and selecting “Dupicate Layer”. When you have 2 layers make sure you select the top one before continuing (most actions in the gimp only affect the currently selected layer. Don’t worry, your selection in the image does not depend on a layer, so will not be lost. Of course, you could have done this before starting the editing too).
Next we will feather the selection a little, this makes the edges of the selection slightly transparent, which makes the effect look a little better. Either right click on the image to get a menu or use the menu on the top of the image window: Select->Feather.
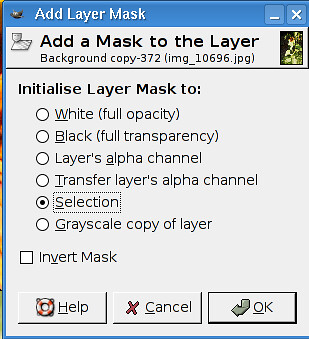
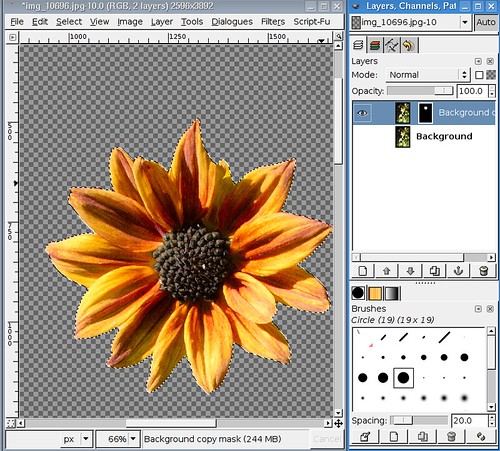
Next we want to make a layer mask on our top layer. Right click on the layer in the layer menu and select “Add Layer Mask”, then select “Selection” when asked what to initialise the mask to. A layer mask restricts what is visible of the layer, so we are going to make only our selection visible.
By clicking the “eye” icon on the bottom layer, you can hide the layer from showing, which will allow you to see your new masked layer of the flower (don’t forget to turn it back on though).
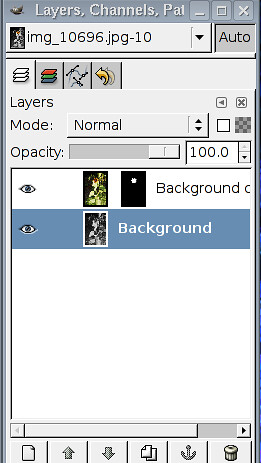
Next we need to make the background greyscale. First make sure you don’t still have a selection by pressing CTRL+SHIFT+A or Select->None from the menu. Next select your background layer in the Layers dialog.
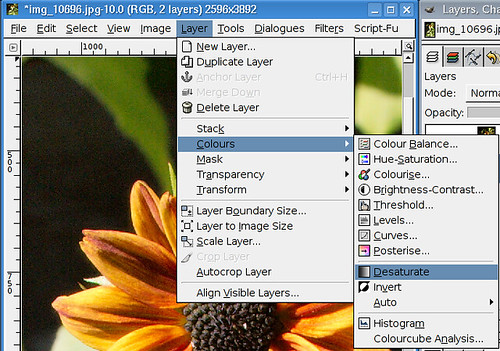
There are several ways to make an image greyscale, the simplest is to desaturate the layer (this will make the current layer greyscale). From the right click menu, or menu bar at the top of the image, select Layer->Colours->Desaturate
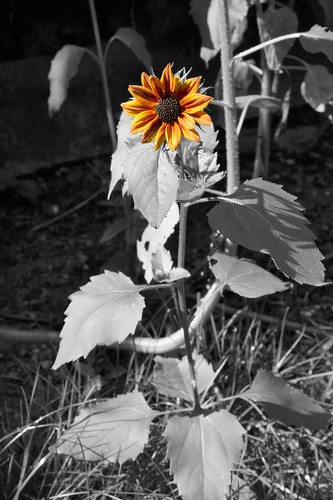
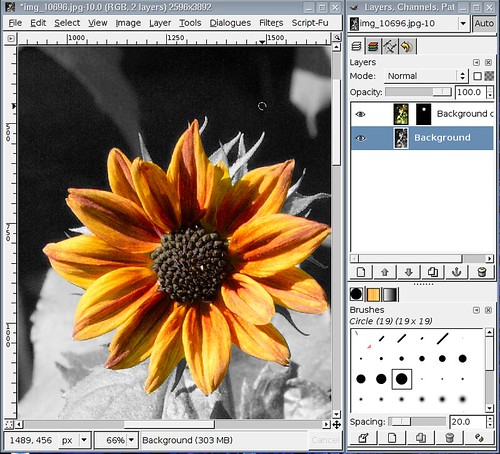
And voila, your background is grey, your foreground is in colour.
There are of course other ways to achieve the same effect, I have only shown one.
Hopefully you found this useful and will consider The GIMP for your photo editing. Let me know if there are any other common tasks that you would like to know how to do in The GIMP and I will probably write up about them.
tags: